Saturday, July 9, 2016

Béchamel Sauce

Béchamel sauce is known as one of the 'Mother sauces' in French cooking because it's a basic sauce that can be used to create many other sauces. Like, cheese sauce, cream of chicken and other cream of sauces, and an easy white sauce for pasta. If you can master this sauce, a world of homemade goodness opens up before you. Fortunately, this sauce is pretty easy once you know a few tricks.
Fun Fact: I was once informed that I say Béchamel like an American. I told them, 'Well I am an American, soo...'
Béchamel is made up of three ingredients, butter, flour, and milk in a 1:1:1 ratio. If you want 1 cup of sauce, use 1 tablespoon of butter, 1 tablespoon of flour, and 1 cup of milk. The butter is cooked with the flour to create a roux (pronounced roo) which acts as the thickening agent of the sauce. The butter binds to the flour so that when the liquid is added the fat doesn't separate, it also lightly cooks the flour so you don't have that awful raw flour taste. 
Now for the part with pictures.
This recipe will yield 4 cups of sauce, but changing the amount id easy if you just follow the 1:1:1 ratio I explained above.
Step 1
4 Tablespoons Butter
4 Tablespoons or 1/4 of a cup All-purpose Flour
4 cups Whole or 2% milk (any lower than 2% and the sauce comes out a little thin, plus you're already using butter fat free milk isn't going to save you now)
Measure out your milk and let it sit out to warm a bit while you get everything ready.
In a large skillet heated over medium-low heat, melt the butter until it is foaming. Add flour and whisk to combine.

The flour mixture will be white at this point.

Let the flour mixture cook, whisking constantly, until it gets a slight tan color and begins to smell nutty, about 30-45 seconds.

Remove the pan from heat and let sit for about a minute. Adding cold liquid into a hot pan can lead to lumps unless you are really careful and know what you're doing. By letting the pan cool just a bit it becomes so much easier to mix in the milk.
Slowly pour in the milk while whisking constantly to get a smooth consistency. (It was almost impossible to get a picture of this cause no one was around to help out. I'll try to get one later and post it.) If you do happen to get some lumps, do not despair, simple pour your mixture into a blender or use an immersion blender to wiz it smooth.
Return pan to heat and bring mixture to a simmer.

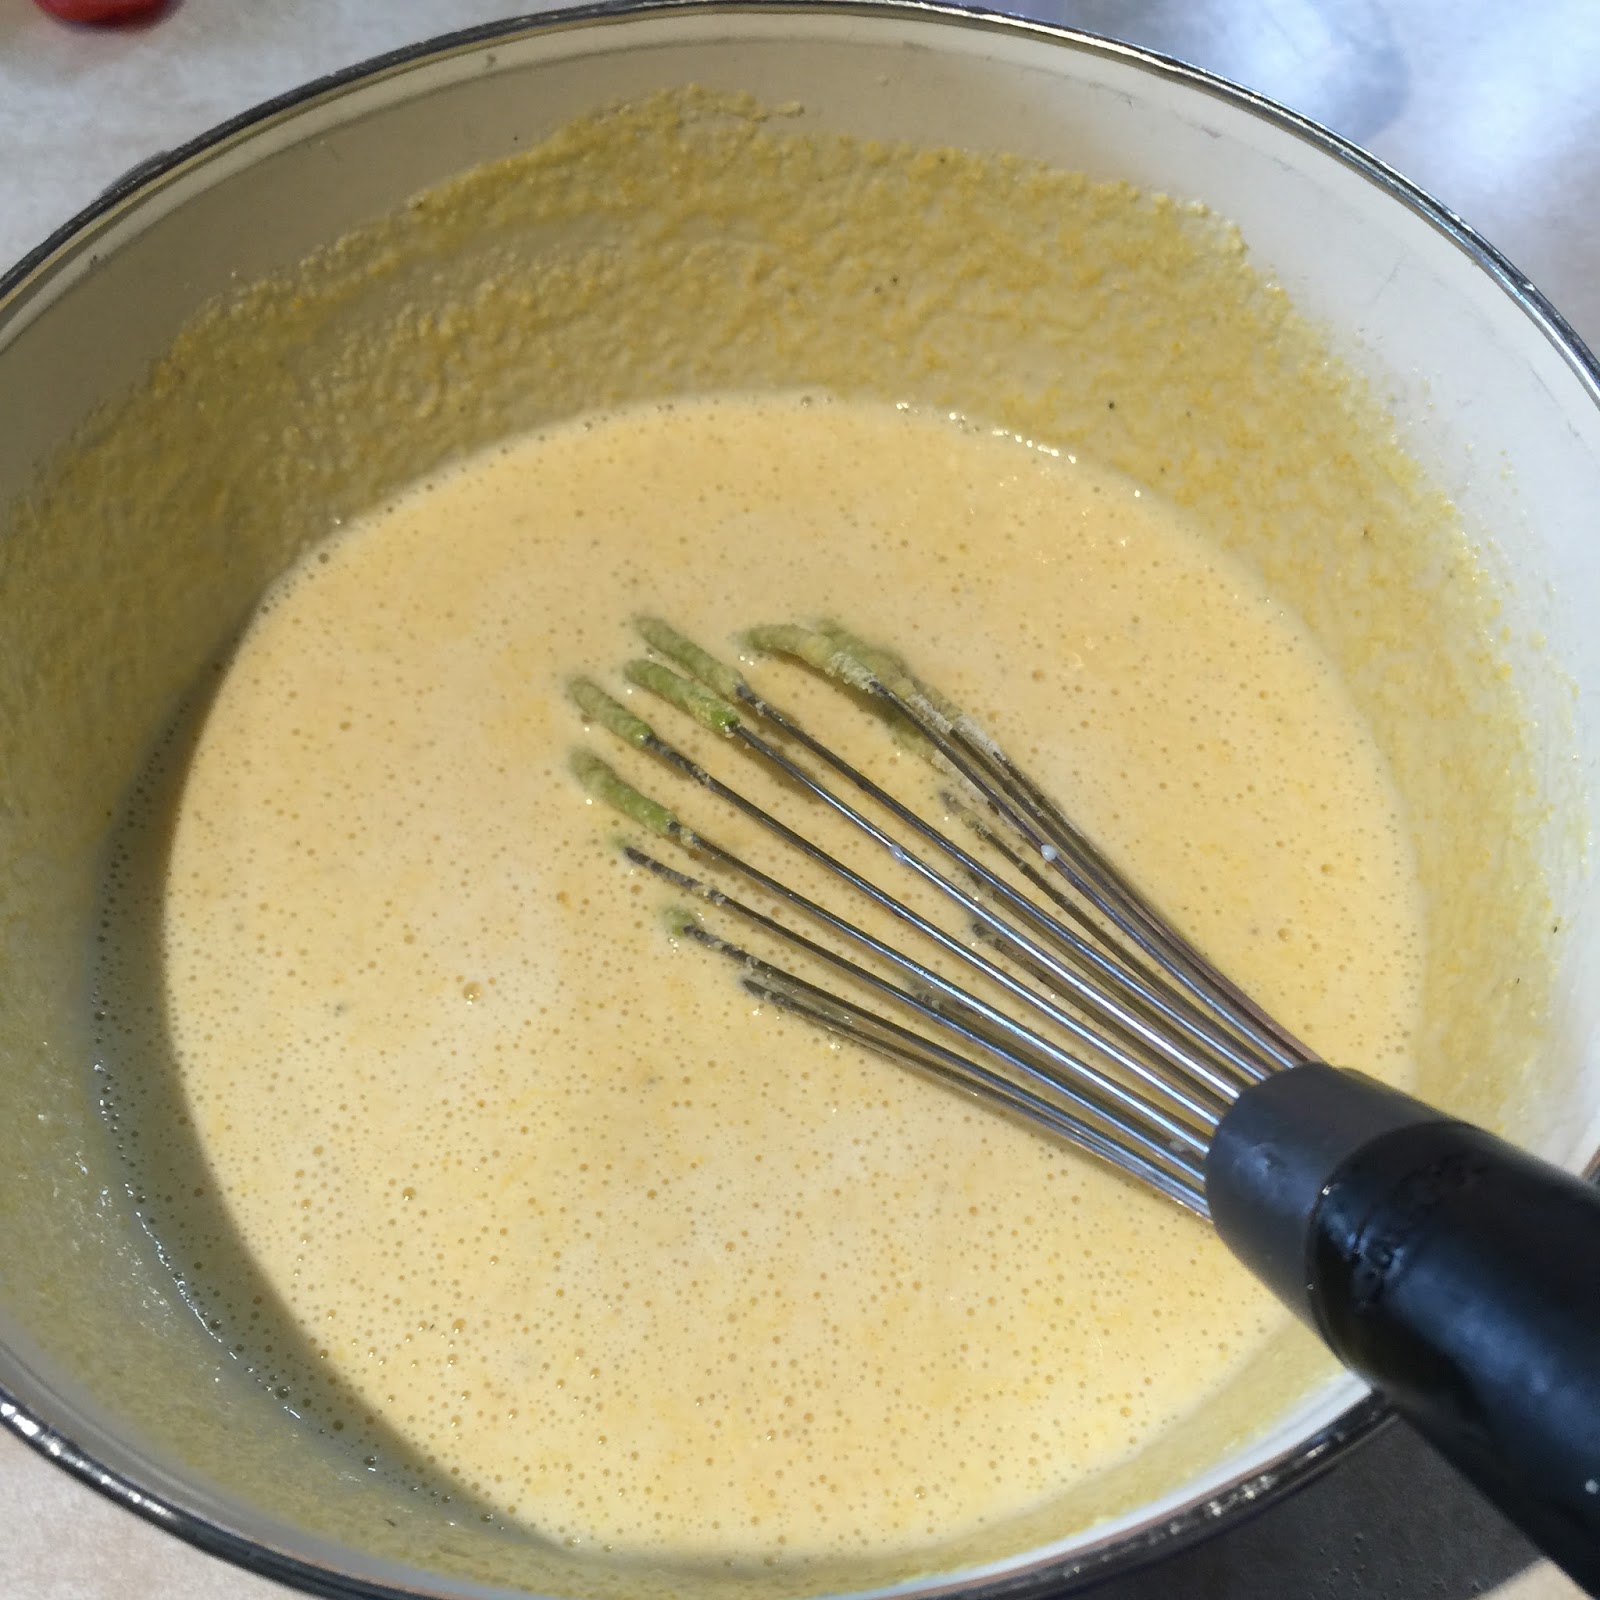
Stirring constantly, allow to simmer until thickened, about 5 minutes. You will know it's ready when it coats the back of a spoon or rubber spatula. Like so-
 Perfect! If you are not going to be adding cheese, then stir in 3/4 teaspoon salt and grind in some fresh pepper to taste. You have now successfully made Béchamel sauce. Take a bow!
You're probably wonder what you're supposed to do with it now. Excellent question. I have some excellent answers.

To create a cheese sauce, once the Béchamel is thickened, turn off the heat and stir in 2 cups of shredded cheese for 4 cups of sauce. Add one hand full of cheese at a time and stir until incorporated. Taste and add salt if needed, usually it's not because cheese is so salty, but sometimes a milder cheese needs a bit of salt. To keep warm, place in a small crock pot. Any cheese will work. Stronger cheeses such as blue cheese may not need as much to flavor the sauce so start with only 1 cup of cheese for 4 cups of sauce.

If you want to make a mock Alfredo sauce, cause real Alfredo is stupidly difficult to make, add 1 1/2 cups of shredded Parmesan to the Béchamel and pour over linguine noodles and serve. Then tell your guests how you spent hours perfecting this sauce. It's so delicious and creamy they'll believe you.

For a fancy Mac n Cheese, add 2 cups of shredded fancy cheese. My favorite mix is 1 cup of shredded Fontina or Gruyere (swiss cheeses) cheese and 1 cup of Parmesan. Pour the sauce over penne noodles and bake in the oven at 425 for 15 minutes or until the top is bubbly and spotty brown. This is my favorite way to use up the last of fancy cheeses after a fondue party. Other good mixes are a Swiss cheese, like Fontina, Gruyere, or Emmental  and blue cheese (only use 1/2 a cup of blue cheese). Sharp cheddar and Brie go well together. Remove the rind from the Brie and cut it in to pieces.

To create a 'Cream of' sauce, saute 1 large, diced onion in a large skillet along with the main ingredient of the cream of. So if the recipe calls for cream of mushroom, add 1 cup of sliced mushrooms to the pan along with the onions. For cream of chicken, slice up 1 chicken breasts and cook with the onions. 
Remove onion mixture from pan, placing in a bowl and set aside. Make the béchamel in the skillet. When the sauce is thickened add in the onion mixture and stir to combine. Season with salt and pepper.
You can make a cream of mushroom or celery and pour it over baked chicken and rice for a yummy casserole.

You can use the sauce as is to pour over the top of lasagna to make Lasagna Bolognese. This lasagna is made with a meat sauce and no ricotta. For some reason, my kids don't like ricotta, so I make this lasagna instead. Béchamel sauce is poured over the top to create rich creamy finish to this dish. To make- After béchamel is made, mix in 1 cup shredded Parmesan cheese. Add 3/4 cup béchamel sauce to 6 cups meat sauce. Layer meat sauce,3 no-boil noodles, meat sauce then 1/3 cup béchamel in a lasagna pan until 3/4 of the way full.


Pour remaining Béchamel sauce over the top and cover with foil. 

Place lasagna in oven heated to 425 degrees. Bake for 30 minutes, or until bubbling. Remove foil and increase heat to 450. Bake for another 15 minutes, or until top is spotty brown. Cool for 15 minutes and serve.

Mmmm boy!

The possibilities are endless when it comes to Béchamel sauce. Hence, why it is a mother sauce. So go forth and make rich creamy dishes. And remember, be sure to make your guests think you slaved away. ;)

Julia

Wednesday, September 30, 2015

Southern Style Cornbread


I know several people who cannot eat gluten, and every time I tell them my cornbread is safe for them to eat they inevitably ask for the recipe. Because, they tell me, they have been looking for a good gluten-free cornbread recipe. Then I drop a culinary bomb on them, any true southern style cornbread should not contain flour! It's all cornmeal. Somewhere along the way someone decided to start adding wheat flour to cornbread, probably because it made for a lighter consistency in the store bought mixes. But honey, if you do it right, it will have a light consistency, along with a deep crust on the bottom.
So grab some of your grandma's jelly, some honey butter, or a big bowl of chili. Cause we're making cornbread.

Step 1

1/3 cup yellow Cornmeal
1/3 cup rapidly boiling Water
3/4 cup Buttermilk
1 large Egg

Pre-heat oven to 450.
Cornbread is traditionally made in a cast iron skillet and if you have one you should definitely use it. But I understand that most people don't have one (I don't understand why they don't, but whatever). A good substitute is a stoneware casserole dish. The stoneware can be preheated in the oven so that the cornbread starts cooking the moment it hits the hot dish.
If using stoneware or a cast iron skillet- Use an 8" skillet or an 8x8 baking pan. Place the empty pan into the oven to preheat.
First thing we're gonna do here is make a mush, which is just hot water and cornmeal mixed. This pre-soaking of part of the cornmeal brings out the corn flavor and adds a smooth consistency to go along with the slightly grainier consistency of the non-soaked cornmeal that will go in later.
In a medium bowl combine the cornmeal and water. Rapidly boiling means that you get it to a good rolling boil then immediately dump it in with the corn meal.
Stir to create a stiff mush, the mush should not be so stiff that is is hard to stir. If that happens, add a few tablespoons of boiling water until mush is slightly loose. Let sit for a few minutes to cool down.
Once the mush has cooled enough that you can touch it, beat in the egg until smooth. Then stir in the buttermilk.

Step 2

2/3 yellow Cornmeal
1/2 teaspoon Salt
1 teaspoon Baking Powder
1/4 teaspoon Baking Soda

Combine dry ingredients in a smaller bowl.

Step 3

Before combining the dry with the wet, we need to finish prepping the pan we are cooking this in.
If using Stoneware or Cast Iron- Pull out the oven rack the pan is on. Carefully pour 2 Tablespoons of cooking oil into pan and spread around using a silicon pastry brush, be sure to get up the sides too. If you don't have a brush, a spatula or even a bunched up paper towel will work. Slide rack back into oven and close the door. Let the oil heat for 1 minute.
If you happen to have some bacon grease lying around, then you should definitely use that.
If you are using a regular metal pan- Pour the oil into the cool pan, then place in preheated oven for 5 minutes, or until oil is smoking.
If you are using a glass casserole dish then you should not preheat it. Just grease it up with the oil, pour the batter in and then put it in the oven. If you try to pour cold batter into a hot glass dish you will end up with a broken glass dish and batter dripping all over your oven.
While pan finishes preheating, pour the dry ingredients onto the wet.
Whisk until fully combined.
The wet and dry are combined at the last minute because as soon as the dry ingredients hit the buttermilk, the leavening agents start to do their thing. Unlike yeast, baking soda and baking powder will only work for so long. To get the lightest and fluffiest cornbread, you want to start cooking it right away so that the leavening is working at full strength until the bread is cooked and all those air bubbles are locked into place.
So once your batter is mixed, immediately take it to the oven. Pull out the rack the pan is on and pour all of the batter into the pan. You should hear the batter start to sizzle as soon as it hits the pan. Unless you are using a glass dish, then you're not going to hear anything. It will be disappointingly quiet.
Slide the rack back into place, close the oven door, and bake for about 20 minutes. The top of the bread should be a nice golden brown, and a toothpick or knife should come out clean when inserted into the center of the bread.

Allow to cool for about 20 minutes. Then run a knife around the edge of the pan and flip the bread out onto a cutting board.
The bottom of the bread will be a dark brown and nice and crunchy.
Oh, yeah.
Sop there you have it, the best damn cornbread you will ever have. Unless you get someones Southern grandma to make you some.
Y'all come back now, ya hear!
~Julia


Monday, September 14, 2015

Homemade Barbecue Sauce


I do a lot of grilling and barbecuing over the summer and I put a lot of effort into making it come out perfect. So why would I want to ruin all that hard work with a bottled BBQ sauce? Especially when making your own BBQ sauce is so easy.
How easy?
So easy I hardly need any pictures to show you how to do it.
I have created a base recipe that can be used on its own or to create several versions of BBQ sauce, from variations on sweet to extra spicy.

Base BBQ Sauce 

4 cups Ketchup
4 cups packed Brown Sugar
1 1/2 cups Cider Vinegar
1/2 cup Agave Nectar
1/2 cup Worcestershire Sauce (omit to make sauce Vegan or fish free)
1 Tablespoon dried Thyme
1 Tablespoon Dijon Mustard
1 Tablespoon Garlic Powder
1 Tablespoon Onion Powder
1 Tablespoon ground Cumin
1 Tablespoon Paprika
2 Tablespoons Tomato Paste

Whisk all ingredients together in a large pot. Simmer over medium heat for 30 minutes. Keeps in the refrigerator for 2 weeks or in the freezer for 3 months.

See how easy that was? You don't even need a picture. I have one anyway.


Lovely.

If you are omitting the Worcestershire Sauce then add a 1/2 teaspoon of Liquid Smoke, hickory flavor. Liquid smoke is just smoke that was trapped in water and concentrated so they could bottle it. You can find liquid smoke right next to the worcestershire sauce, which is found next to the steak sauce, which is found next to the ketchup. If you can't find the ketchup you're on your own.

The base sauce is sweet with no spice and even though lots of vinegar is added at the beginning, 30 minutes of simmering cooks a lot of it out so it's not too acidic. Most recipes call for corn syrup but I prefer the extra depth of flavor the agave nectar brings, plus it's often easier to find now a days. 

Now lets talk variations. All variations use the base sauce, things are just added or replaced. If you want to make a few versions out of one batch just mix together the base sauce ingredients then divide it evenly into 2 separate pans.

Spicy BBQ Sauce

1 recipe Base BBQ Sauce
1 1/2 teaspoons whole Szechuan Peppercorns
1 1/2 teaspoons whole Black Peppercorns (preferably Tellicherry)
1 1/2 teaspoons ground Chipotle Peppers
1 1/2 teaspoons Cayenne Pepper

Let's talk spices. Normally I try to keep my ingredients stuff that is easy to find in the regular stores, but I'm making an exception here with the szechuan peppercorns because they are what really puts this sauce over the top. You can find them in a spice shop, I get mine from Penzeys Spices. If you can't find them, or don't want to make the effort, the mixed peppercorn blends you can find in most stores can be used in replacement. Substitute the szechuan and black peppercorns for 3 teaspoons of the mixed peppercorns. It's not going to be nearly as awesome though, I'm just saying.
I get the ground chipotle peppers from Target so I don't consider it too hard to find.

Using whole peppercorns is key because once they are ground they are only potent for about a week. Grinding your own spices is easy. You can get a little spice grinder, or re-purpose a coffee grinder for just spices, OR you can do what I do and use a pepper mill. 

This one used to be a dual grinder but the top half broke, so i now I just use it as my spice grinder. I put the whole spices in and out comes freshly ground spices. It takes a little more physical effort than the other options but it's small and easy and cheap to get a replacement. Plus I'm only ever grinding a few teaspoons at a time.

Okay, back to the recipe.

Preheat a large pot over low heat. Take your freshly ground spices and the chipotle and cayenne pepper, place in the pot and toast for 30 seconds. If you haven't mixed the base sauce yet then add in the cumin and paprika as well. You know the spices are ready when they give off a strong, warm scent. Toasting the spices helps to release their oils and increases flavor.


Add base sauce ingredients, whisk together. Increase heat to medium and simmer for 30 minutes.


Can you feel the heat from all those spices? Trust me, you will.

Sweet Variations-

Honey BBQ Sauce

Replace the agave nectar with 1/2 cup Honey

Rootbeer or other soda flavored BBQ Sauce

Add 1 cup rootbeer or other soda to the base sauce before simmering. Be warned, cola and caffeinated sodas can lend a bitter taste to the sauce. Some people like that, so, whatever. My favorite sodas to add are rootbeer or orange.
The sauce won't actually taste like the soda in question but it does add a nice flavor. Plus when you tell people there is rootbeer in the sauce, their eyes light up and you get a lot of "Ooo"s. Make sure to get a little more soda than you need for the recipe. Inevitably your kids will see the can or bottle and go "Mom! I want soda!". Best to be prepared.

Whiskey BBQ Sauce

Add 1 cup whiskey to the base sauce before simmering. This variation works really well with the spicy variation as well.

Marmalade or other Jam/Jelly Add-Ins

Replace the agave nectar with 1/2 cup of marmalade or other jam/jelly. 
This variation is inspired by my Mom who loves to experiment with new jam and jelly flavors, then gives me a jar and says "Here, try this.". And I'm like, what am I supposed to do with Jalapeno Tomato jam? So I started putting it in BBQ sauce. I've come up with some really great ones over the years because of this. My favorite is using her Irish Whiskey Marmalade to make BB sauce to use over pork or chicken. You can get the same flavor by adding 1 cup of whiskey along with the marmalade.
Another favorite is grape jelly. It tastes great over meatballs and makes a fun appetizer for parties. Apple jellies are great for a sauce served with pork. 

Other random things I have experimented with over the years

Juice- Apple cider, Orange juice, Pineapple juice all work great, add 1 cup
Fruit- Apple chunks, whole Cranberries (think smoked turkey), Pineapple chunks, add 2 cups
Various spices- If a food I'm cooking has a certain over powering spice, like ginger or cinnamon, I will add a tablespoon of it to the sauce to help bring the flavors together.

The most important part of BBQ sauce is to be creative with it and make it your own. And to make sure there is enough to smother over your latest smoky creation.

~Julia


Thursday, September 3, 2015

Quesadillas


Quesadillas are easy to make. I once made them in a tiny hotel room kitchen for 9 people. So if they're so easy why am I making a recipe for them? I will tell you.
Just melting cheese in between a folded tortilla doesn't make for something memorable. Just something edible. To elevate your Quesadillas to something worth getting excited over there are a few easy steps.

Step 1

2 cups Southwestern vegetable mix or 1 cup corn and 1 cup cooked black beans
1/4 teaspoon salt
1 tablespoon Lime Juice

The vegetable mix I am referring to here is found in the freezer section along with the rest of the frozen vegetables. There are many different brands but they all contain about the same stuff, corn, black beans, onions, and a mild pepper.

If you cannot find them you could try having someone suggest you use a horrible canned chili instead, it should motivate you to search a little harder. Don't laugh, that's actually what happened to me when I was making them at the hotel. Couldn't find the vegetable mix in the grocery store until my sister suggested I use canned chili. I made a disgusted face then all the sudden noticed the southwestern blend in the freezer case right in front of me.

Or you could just substitute 1 cup frozen or fresh corn and 1 cup canned black beans.

The vegetables do not need to be defrosted before cooking, the hot pan will do that for you.
Heat a medium skillet over medium heat. Add the frozen vegetables to the pan along with 1/4 teaspoon salt and dry toast (no oil)  the vegetables until the corn has a little bit of browning to it.


Remove corn and bean mix from the pan and place in a bowl. Stir in lime juice. Set aside.
Clean out the skillet and use it for the next step.

Step 2

2 cups Corn and Bean mix (the one I just told you how to make)
4 cups shredded Sharp Cheddar
10-12 Flour Tortillas
1/4 cup Olive Oil 
2-3 tablespoons Kosher Salt

Heat the skillet over medium to medium-low heat. You will need to adjust the heat throughout the cooking process if your quesadillas start to brown too quickly.
Using a pastry brush, brush one side of a tortilla with a thin coating of oil, then sprinkle with kosher salt.

Lay the tortilla, oiled side down, in the pan. Add cheese and a few spoonfuls of the corn and bean mix.

Fold the tortilla over and move the curved edge to match up with the curve of the pan (yes, there is a good reason).

Repeat on the other side of the pan.

Toast until dark golden brown. Flip and toast on the other side. The cheese should get nice and melty.

Remove quesadillas from pan, allow to cool for a minute, then cut and serve.

See how easy that was.

Until next time,
Julia


Tuesday, August 25, 2015

Red Salsa, Green Salsa

Homemade salsa is one of those things that iseasy to make yet hardly anyone does it. I don’t know why not. You serve up some homemade salsa at your party and you are sure to get lots of Oos and Aaas. Then everyone will ask you for the recipe and then you direct them to my blog. (I am not above shameless self promotion) 
The two salsa I am going to show you how to make are made from two different fruits. The red salsa is made with tomatoes (yes they are a fruit), specifically Roma or Plum Tomatoes, though any type of tomato can be used. Roma tomatoes have firmer flesh so they keep their shape better and tend to be cheaper. The second one is made from Tomatillos which are not tomatoes, they are actually closely related to gooseberries and when they ripen fully they turn yellow or purplish and become sweeter. For the purpose of the salsa the unripe green ones are used. 
Got some chips handy? Great! Let’s make salsa…

Red Salsa or Pico de Gallo

10-12 Roma Tomatoes
4 Green Onions
¼ cup minced Cilantro (about half a bunch that you would get from the store)
1-2 cloves of Garlic (depending on your tastes)
Serrano Peppers, 1-2 peppers= Mild, 3-4= Medium, 5 or more= Hot 
2 Tablespoons Lime Juice
Salt
Tomatoes are very juicy, which is great for topping a burger or sandwich, not so great when you have several inches of juice watering down your salsa and making the chips soggy. The seeds contain most of the extra juice so removing the seeds is very important.
Remove the stem area from each tomato. I use a tomato shark, also called a strawberry huller, the sharp teeth make removing the stem easy.
 Cut each tomato in half.
Using your thumb, scoop the seeds out into a bowl.
If you can’t get to all the seeds, cut the tomato in half again and that should expose the rest of the seeds.
Look at all that juice that is not going to ruin your salsa. 
Slice each tomato section into ¼ inch strips.
Make a neat little pile with the strips and cut across to make small cubes.
Transfer tomatoes to a strainer and place strainer over a bowl to catch the drips.
 Toss tomatoes with ½ teaspoon salt and allow to sit at room temperature for at least 1 hour. The salt will help the tomatoes release their juices. 
That’s about a cup of juice that strained out of the tomatoes. The longer the tomatoes sit the more juice you will get.
While the tomatoes are sitting go ahead and prep the rest of the ingredients.
Wash the cilantro and green onions. Cilantro is often mistaken for flat leaf parsley because they look very similar. To tell the difference check for a few things. Cilantro has a strong peppery smell, it’s leaves are thinner and more fragile, and the leaves have more of a fringe than parsley. An easy way to remember is Cilantro’s leaves have fringe, fringes are fun and cilantro is often used in party foods.
Unlike parsley, the stems of cilantro taste just as good as the leaves so you can use the whole thing. Some people don’t like the texture of stems so just break off the thicker bottom part of the stem, right under the last set of leaves. The softer stem that the leaves are on blends in well with everything.
Mince the cilantro and garlic. Thinly slice the green onions.
Serrano peppers have a nice flavor to go along with the heat. Any hot pepper can be used but I like the flavor that Serranos have. When working with hot peppers it is important to wear gloves because even after you wash your hands the oils will linger on your skin and can easily be transferred by touch, like to your eye when you rub it without thinking. 
The seeds and white membranes contain the most heat in the pepper, but they don’t have much flavor so it is best to remove them.
Decide how hot you want your salsa and use the recommended number as shown in the ingredient list. Cut of the stem and slice the pepper in half, using a spoon, scrap out the seeds and membrane.
Finely mince the peppers.
Teeny, tiny pieces. 
The fine mince is important to evenly distribute the peppers flavor and heat. You don’t want someone in tears because they bit into a big piece of pepper.
Combine all the ingredients in a medium sized bowl, add lime juice and stir to combine.
Refrigerate for 1 hour to allow the flavors to blend together. Before serving, taste the salsa and add more salt if needed. Cold foods need more seasoning, that is why you wait to adjust the salt until after it has been chilled in the fridge.
Serve with chips. Instant party.

Green Salsa or Salsa Verde

10-12 Tomatillos
4 Green Onions
¼ cup minced Cilantro (about half a bunch that you would get from the store)
1-2 cloves of Garlic (depending on your tastes)
Serrano Peppers, 1-2 peppers= Mild, 3-4= Medium, 5 or more= Hot
2 Tablespoons Lime Juice
Salt
The ingredient list for this salsa is almost identical, the biggest difference of course being tomatillos instead of tomatoes. But tomatillos need to be cooked is you want them to taste good, so why not cook the rest of the ingredients too. Roasting brings out the best flavor. You can roast them in the oven or on the grill.
Tomatillos are sold with their husks still on-
Tomatillos should be firm. When picking them out in the store give them a little squeeze to check for soft spots. 
Peel the husk back and remove it by giving it a little twist.
Rinse the tomatillos, then remove the stem.
For the rest of the items to be roasted- 
Cut off the roots from the green onions
Remove the seeds and membrane from the peppers
Leave the garlic cloves in their skins (once roasted they come out easy)
The cilantro, lime juice, and salt will be added later.
To roast in the oven, heat oven to 425. Line a large cookie sheet with aluminum foil, it gets messy . Spread tomatillos, onions, peppers, and garlic out in a single layer. Roast in oven for 15-20 minutes until spotty brown and tomatillos are soft. You may need to remove the onions after 8-10 minutes because they cook faster. 
To grill, heat grill to medium-high heat. Lay out a piece of aluminum foil directly onto the grate, tomatillos release a lot of juice. Lay out the ingredients in a single layer. Grill for 15-20 minutes, turn the tomatillos over halfway through. Again, you may need to remove the onions after 8-10 minutes.
I grilled mine, because it’s summer and I love my grill.
Here I’ve turned the tomatillos over and the green onions are done so I pulled them off the grill right after I took the pic.
Here’s what the tomatillos look like when they’re done. You should be able to easily smoosh them with little resistance. And see what I mean about them being messy when they cook? Do your self a favor, use foil.
Another reason for the foil is that soft tomatillos are hard to move off of a grill, so just use the foil to dump everything into a bowl.
Allow ingredients to cool for 10 minutes. If you put hot stuff onto fresh cilantro it is going to wilt and loose it’s flavor.
Peel the garlic and discard the skin.
After tomatillos have cooled, place all the cooked ingredients into a food processor or blender. Add the cilantro, lime juice, and ½ teaspoon of salt.
Process until mostly smooth.
Refrigerate for 1 hour, taste and add more salt if needed.
Then get yourself some chips!
-Julia